Do you have questions related the best virtual pdf printer? No worries, this guide has a number of solved answers for you. Make sure you stick to the guide till the end.
It is known as an application that replicates the software interface for a physical printer. Virtual printer gives the user to do multiple tasks without actually printing anything. They work with print drivers that are inclined to send the output to other applications instead of a physical device. The software is best known for saving resources as it makes it facile to carry out work that would have involved the wastage of ink and paper. Printer testing and correction or sending documents to a fax server are a fine example of such tasks.
Not only this but creating PDF files from other type of documents and creating image files of multiple formats from other type of documents is also doable by this. Virtual printer allows you to view documents before printing, it enables the user to identify errors beforehand. Another perk of having a virtual printer is that you can add special features to a document before printing.
Pdf is one of the most used and supported formats all over the globe. For your ease, you can add Pdf printer app to your Apple Mac and utilize the feature to print wirelessly to Pdf files from any device without any hurdles. There are a number of versions you can add, but choose the one that suits you the most. Here are the steps to do so;
Step 1: Firstly, you need to double click on the “Mac hard drive” icon displayed on the desktop. Choose the “Applications” folder and then you need to select the “Utilities” folder from the given list. Moving on, you need to select the option “Print & Fax” from the list of utilities.
Step 2: Once the Print & Fax window has opened, you need to click on the “+” button below the pane that has the list of printers. Wait for the “Add Printer” window to open and type “PDF” in the search bar given at the top-right corner of your screen.
Step 3: Here, you need to select “Adobe PDF” from the given list of printers and in the “Print Using” section, you need to select “Adobe PDF”, it will be visible in the drop-down menu of the installed drivers. In case you don’t witness Adobe print driver in the drop-down menu, you need to go to adobe.com and find the Adobe Print Driver Plug-in download for mac.
Step 4: Furthermore, you need to click on the button that says “Proceed to download” and download window will pop up. Here, you need to select “Print Descriptions” folder in order to download the PDF Plugin file and also the Acrobat Distiller file. To conclude the method, click on the button that says “browse” and then “Mac hard drive” > “System Folder” > “Extensions” and lastly “Print Descriptions.” Lastly, you need to click on the “Add” button in the Add Printer window and you will witness the added printer in the list of available printers.
PDFelement for Mac is all-in-one power pack that allows you to edit, annotate, create, and convert Pdf documents with a few clicks. In case you’re worried about the security, the software allows you to protect pdf files with passwords. You can also digitally sign the documents too. Talking about printing, it is equipped with one of the best printing functions. Printing size can be easily edit during the printing process too. There are a lot of options in the market such as foxit virtual printer, pdf995 virtual printer and many others but PDFelement surely margins them all. Here are the steps to print to pdf in MacOS using PDFelement;
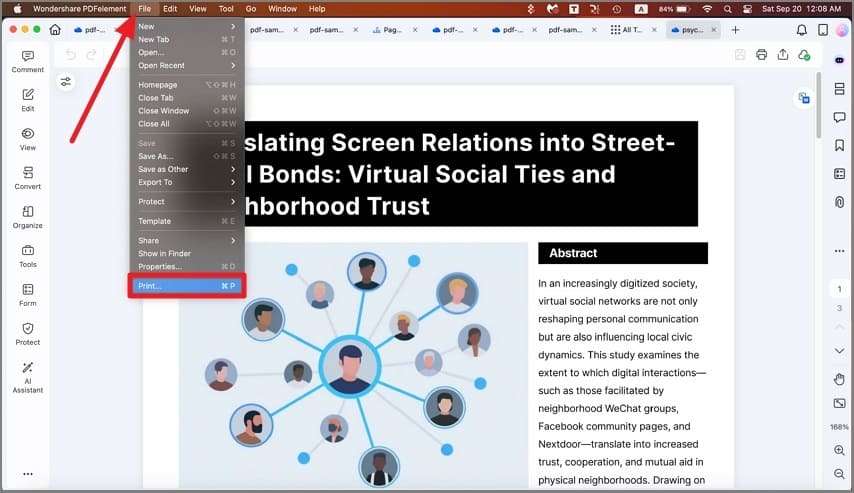
Step 1: Open and Print
The first step is to open the file you need to print to PDF with PDFelement. You need to click “File” > “Print” or you can also use “Commad+P” keys in order to open the print command window.
Step 2: Step Printing Options and Save
In this step, you have the can alter the printer options the way you want and proceed. Furthermore, click the pdf button on the print window and in the drop-down menu, you need to choose “Save as PDF”. You need to name the pdf file and also select the desired location for it. Like all the other products of Wondershare, PDFelement also gives you an easy interface to print to pdf in MacOS.